Cheaper Alternative to Wallpaper
Cheaper Alternative to Wallpaper
Wallpaper is a great solution to spice up any room! It’s perfect for when you want to add color, texture, and depth to your space. Wallpaper can turn a bland, cold space into a welcoming and exciting one! Unfortunately, wallpaper has its cons. Wallpaper is expensive, difficult to maintain and remove, colors can be affected by sunlight and shadow, and some fragile wallpapers only last about 5 years. Peel and Stick wallpaper have been a popular alternative to traditional wallpaper, but it’s almost as expensive! Peel and Stick wallpaper can also be tricky to apply. Once the adhesive is on the wall, it’s difficult to reposition if you need to make edits.
If you’re looking to elevate your space but wallpaper is out of budget, save your money and paint your walls instead! Paint is substantially cheaper than wallpaper and you have the freedom to design and customize your space to make it unique and special. This may sound intimidating, and you might not know where to start, so follow these simple steps to see what you’re capable of creating!

“One Week to Sell” S1 E10 “Bridging the Style Gap” available to stream on Discovery+
OPTION 1: TAPE TECHNIQUE
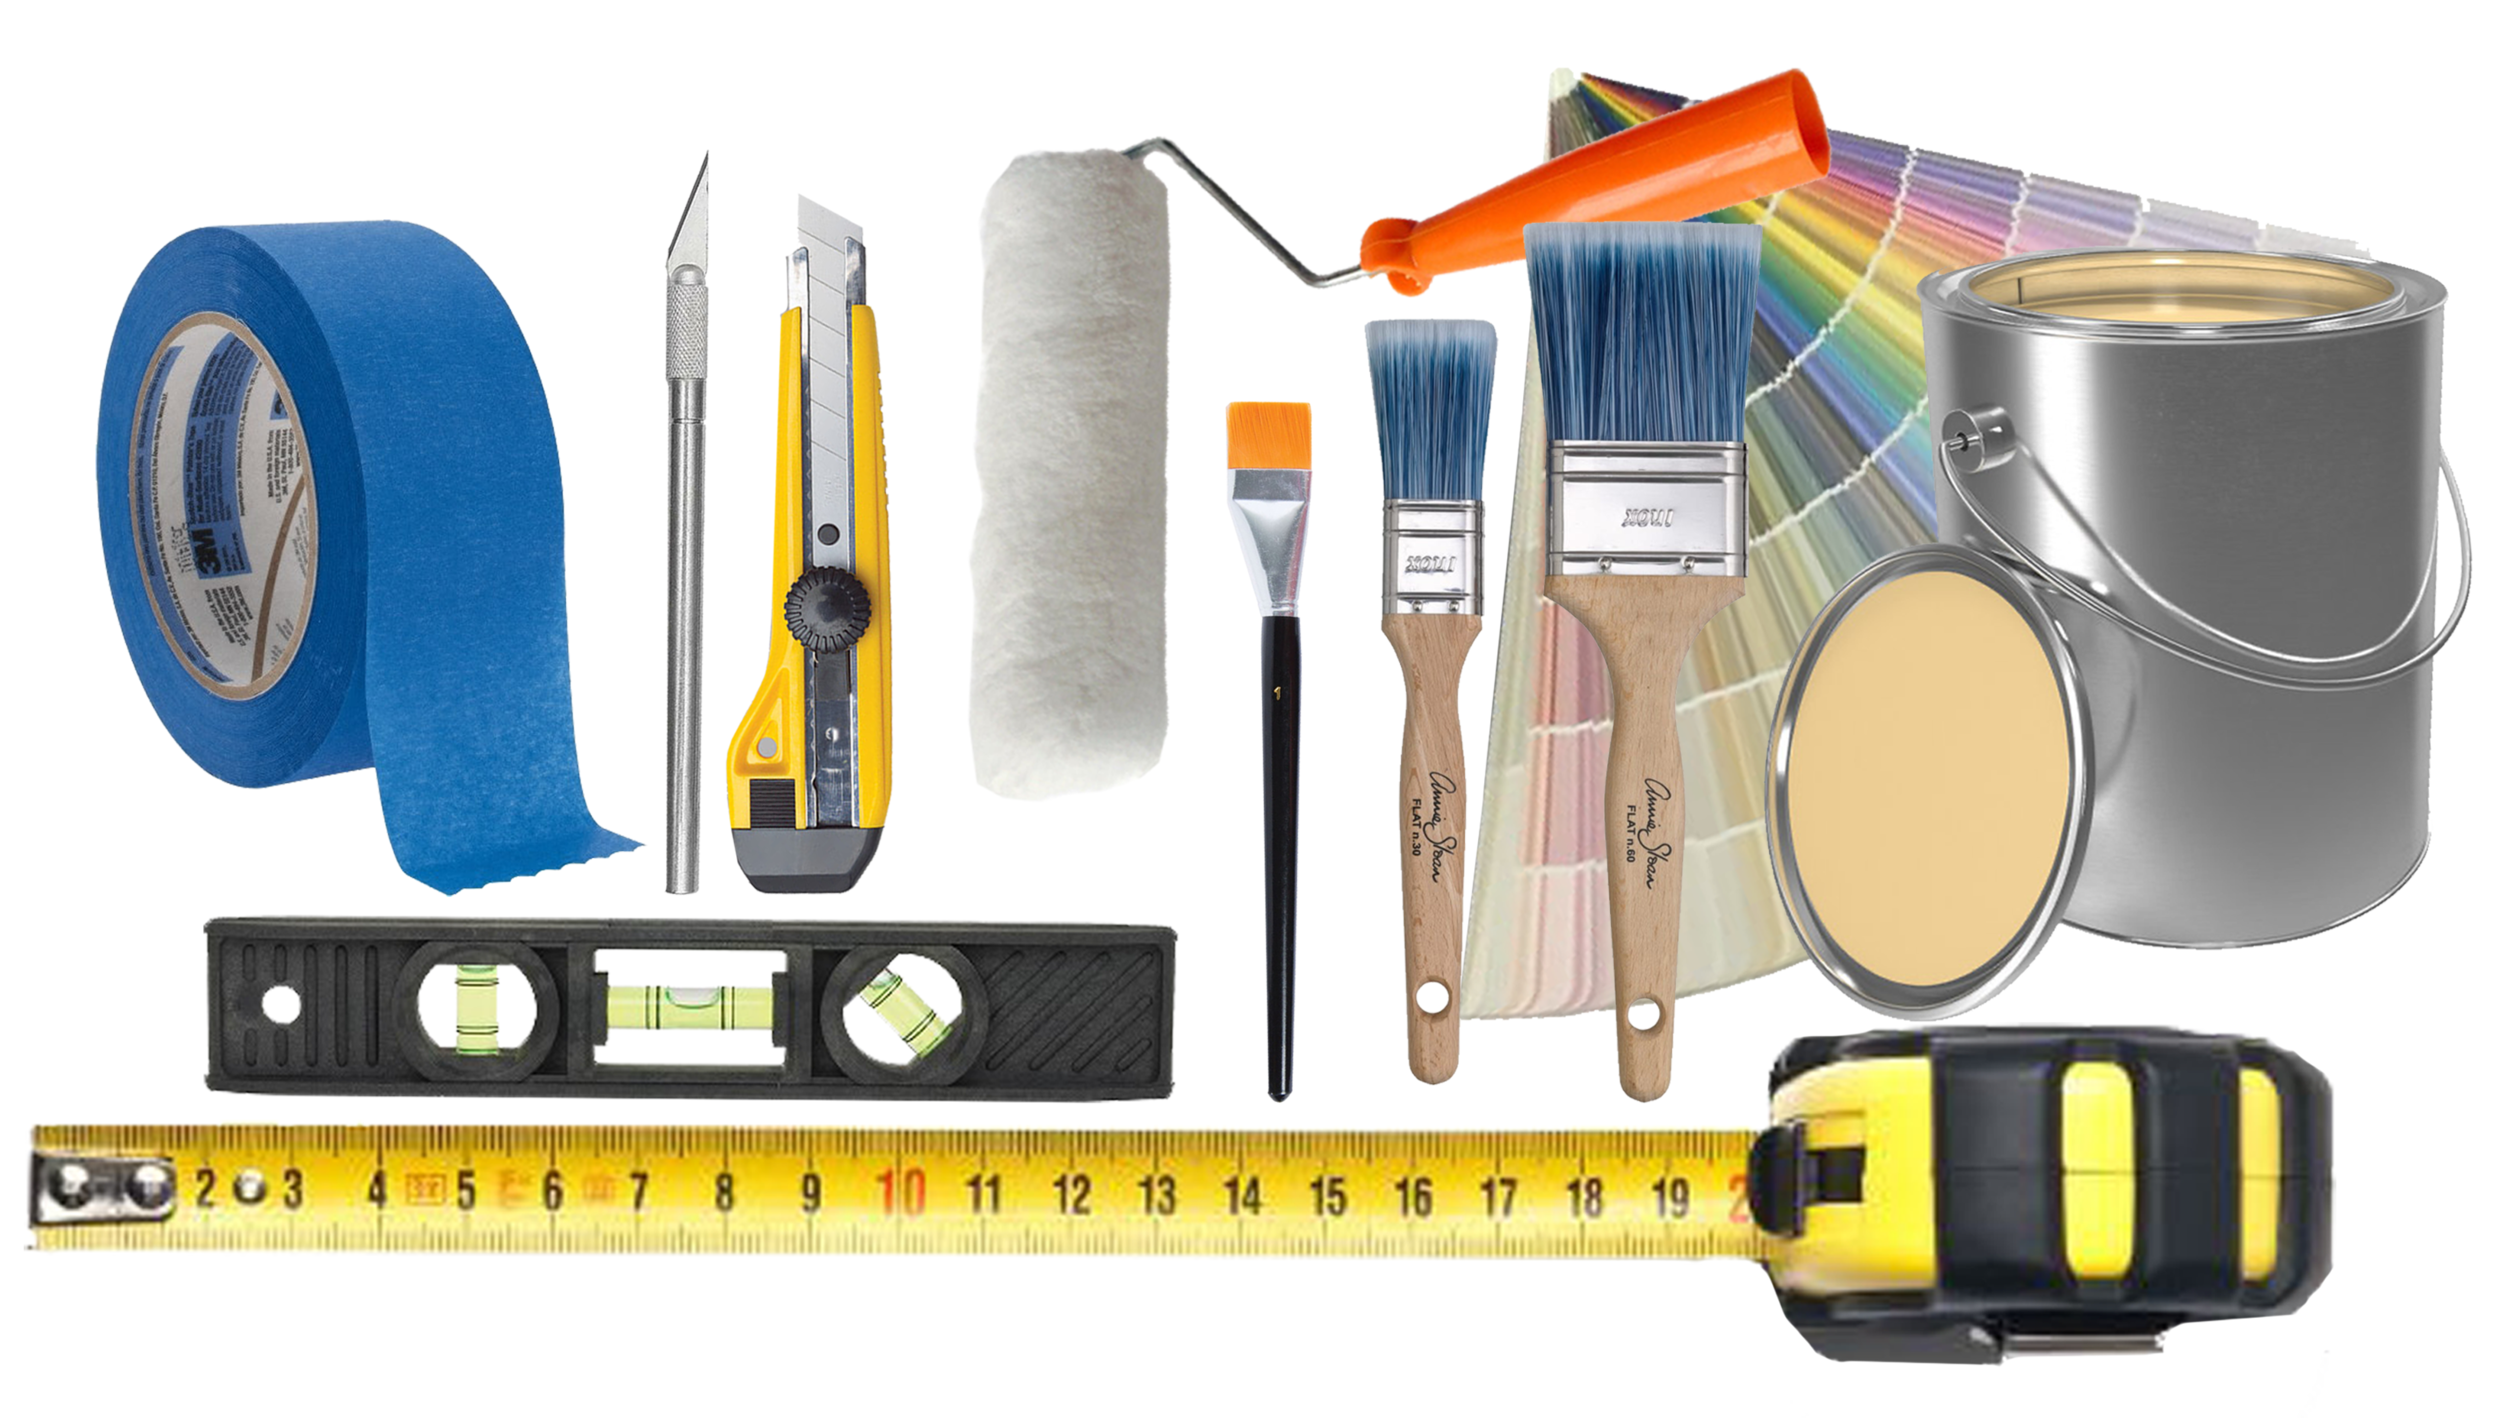
TOOLS & SUPPLIES
Painter’s tape, level, tape measure, exacto knife, roller, brushes, and paint.

STEP 1. SKETCH & BRAINSTORM
On “One Week to Sell” S1 E10 “Bridging the Style Gap”, I wanted to transform the dining room by painting a fresh and modern print that would make the space feel chic and upscale. I imagined a black and white geometric design that would be significant and make the dining room feel very special. Although there will be geometric shapes on all the walls, there will always be movement because no shape repeats twice.
Depending on your vision, it could be beneficial to sketch your ideas and designs out, I know I always do! This not only helps me visualize but leaves me with options so I can choose the best design. It’s also important to decide what colors you want to use as determining this goes hand in hand with creating your design. Most importantly, remember to have fun and get creative! The possibilities are endless!

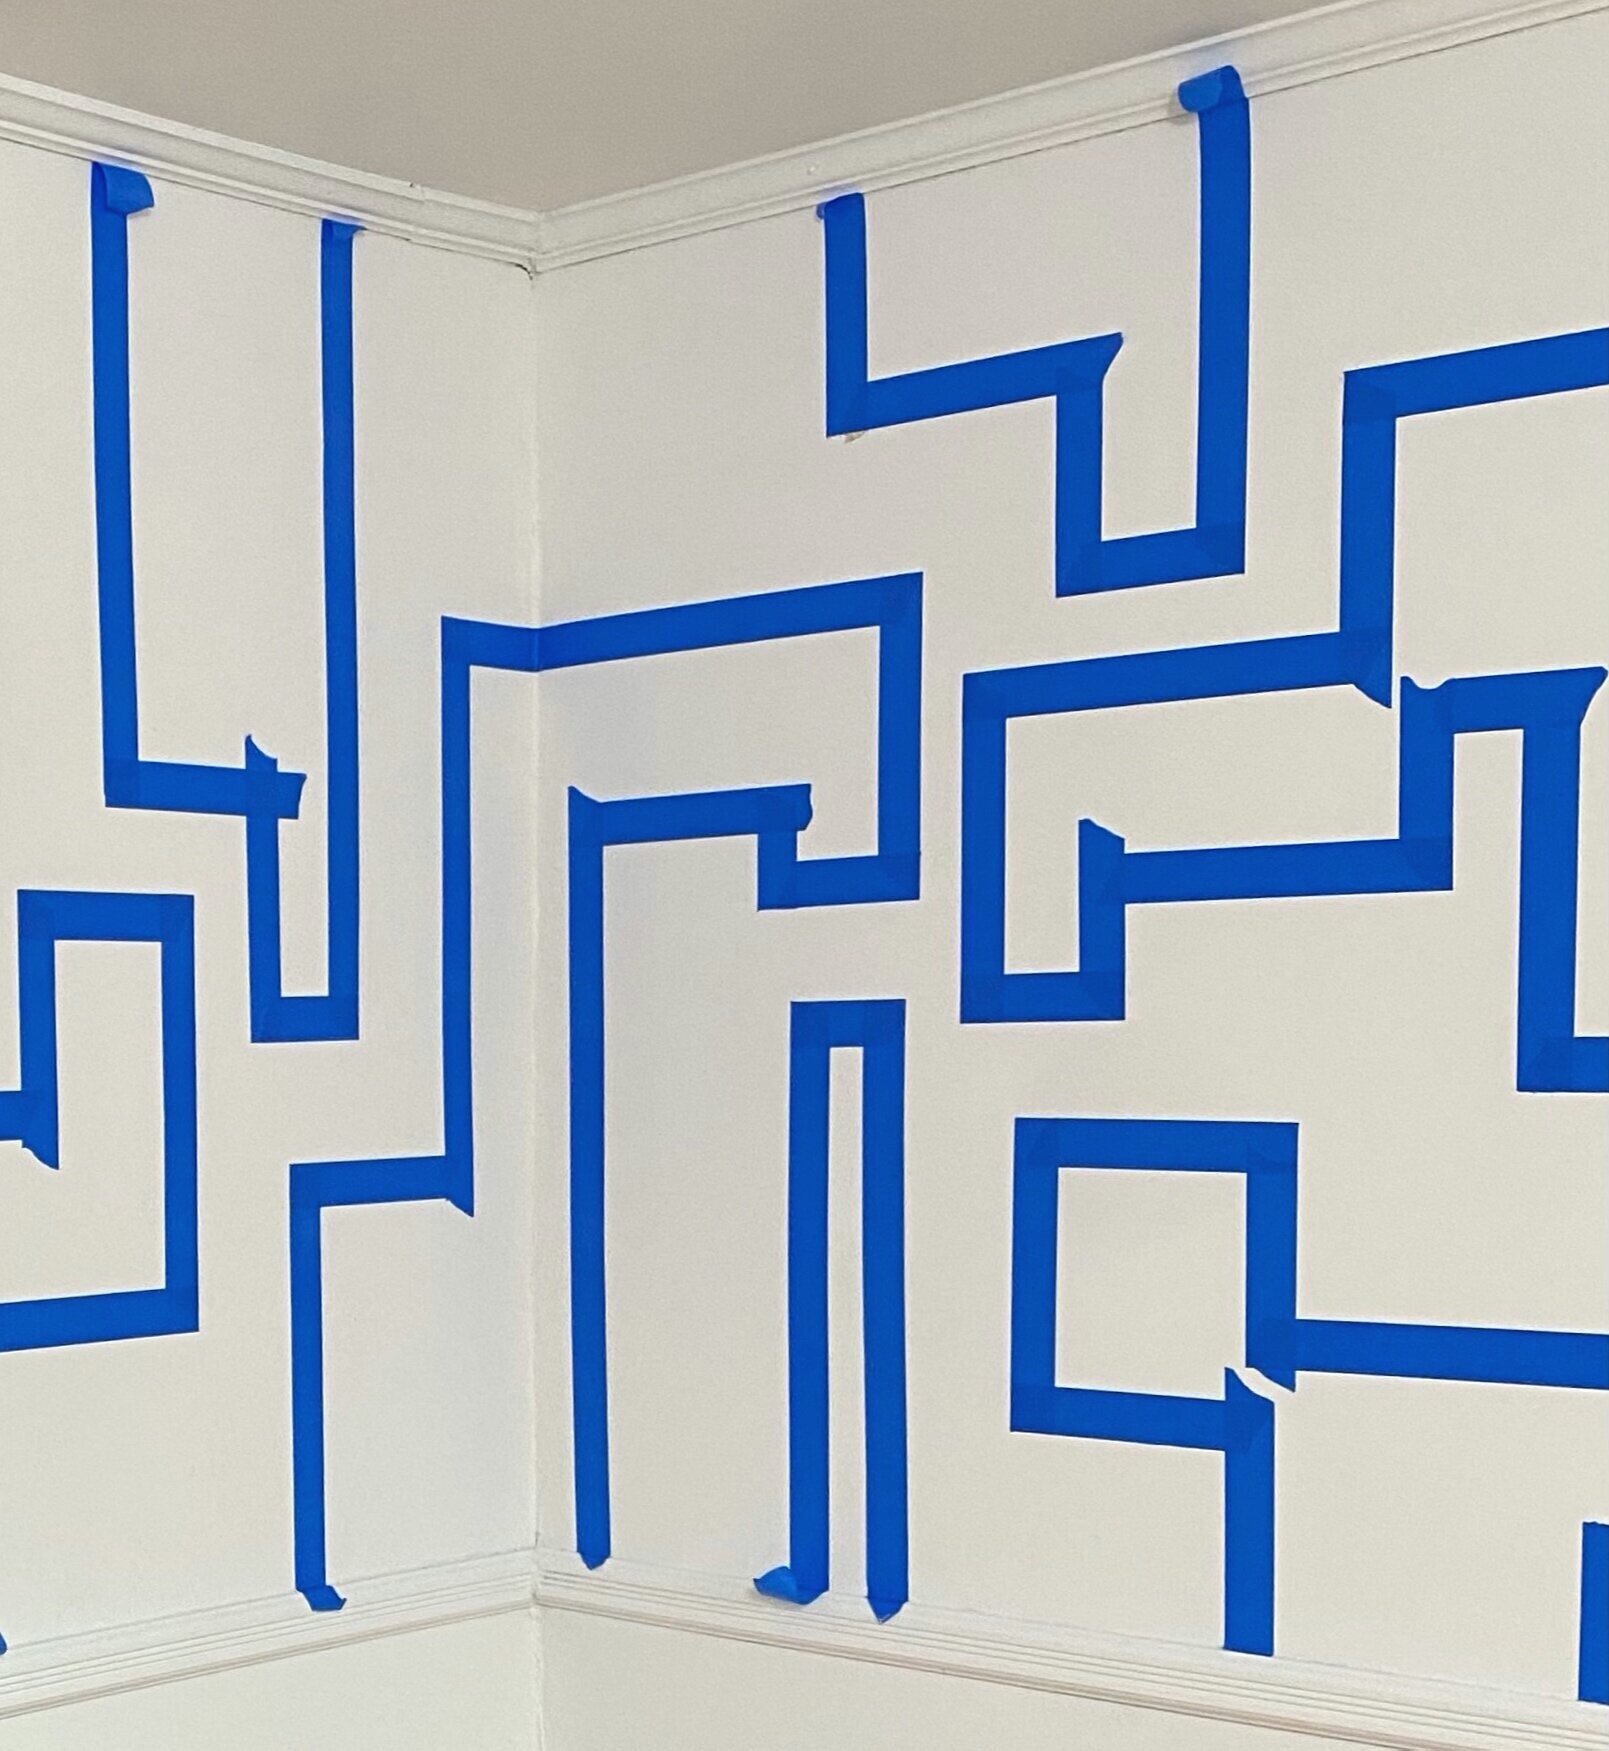
STEP 2. TAPE YOUR DESIGN
Using painter’s tape, tape your design on your wall. Depending on your design, this step might be time consuming, but it’ll be well worth it!
To make this geometric mural as perfect as possible, we used a level to make sure all the lines were straight.
If you’re taping a simpler design like stripes, you can use a tape measure to help make your lines straight. For example, let’s say I want to paint horizontal stripes on my wall, and I want the first stripe to be 14” from the ground. Starting at one end of the wall, I would measure 14” from the ground and stick the tape on the wall. About every 1’ or so as I’m moving along the wall, I will continue to measure 14” from the ground and stick the tape. This will ensure you’re taping in a straight line. You can also make a guide by measuring and marking 14” from the ground about every 1’ along the wall with a pencil. Now you’re able to use the marks you drew as a guide to line up and stick your tape.
STEP 3. CLEAN UP CORNERS
Depending on your design, you will need to clean up any corners you have using an exacto knife and something straight to cut against. We used the level we had on hand, but you could also use a ruler. This step is critical if you want your corners sharp and crisp.
For this geometric design, it was crucial to clean up the corners, so all the lines and shapes were precise. This is tedious work but very necessary!

STEP 4. PAINT
When painting a design like this geometric one, I tend to use a small paint roller and a variety of different sized brushes. I’ll use the roller to paint the larger spaces while using the smaller brushes to paint the edges and corners.
Make sure you’re not painting against the tape to minimize any bleeding that could occur. Depending on the paint you’re using, you will need 2-3 coats or until desired opaqueness.

STEP 5. REMOVE TAPE
Once the paint is fully dried, you can carefully peel off all the tape.
When the tape is removed, assess for any touch-ups you may have. I always use a flat finish when painting a mural like this so we can easily make touch-ups if needed! When using paints with a gloss finish, touch-ups are more visible once it dries.

STEP 6. FINAL TOUCHES
Adding art and other details will bring your masterpiece to the next level!
The geometric mural looked great on its own, but I wanted to hang framed art on the walls to break up the black and white print and bring in some red. Adding this extra layer makes the mural feel even more impactful and adds a pop of color to the room!
BEFORE

“One Week to Sell” S1 E10 “Bridging the Style Gap” available to stream on Discovery+
AFTER

“One Week to Sell” S1 E10 “Bridging the Style Gap” available to stream on Discovery+
OPTION 2: FREE HAND IT!
Another technique to use is to hand paint a design. This might sound even more intimidating than using tape but, it can be simpler! If your design has curves, is irregular, or has a lot of free edges that tape wouldn’t be helpful for, this could be perfect for you!
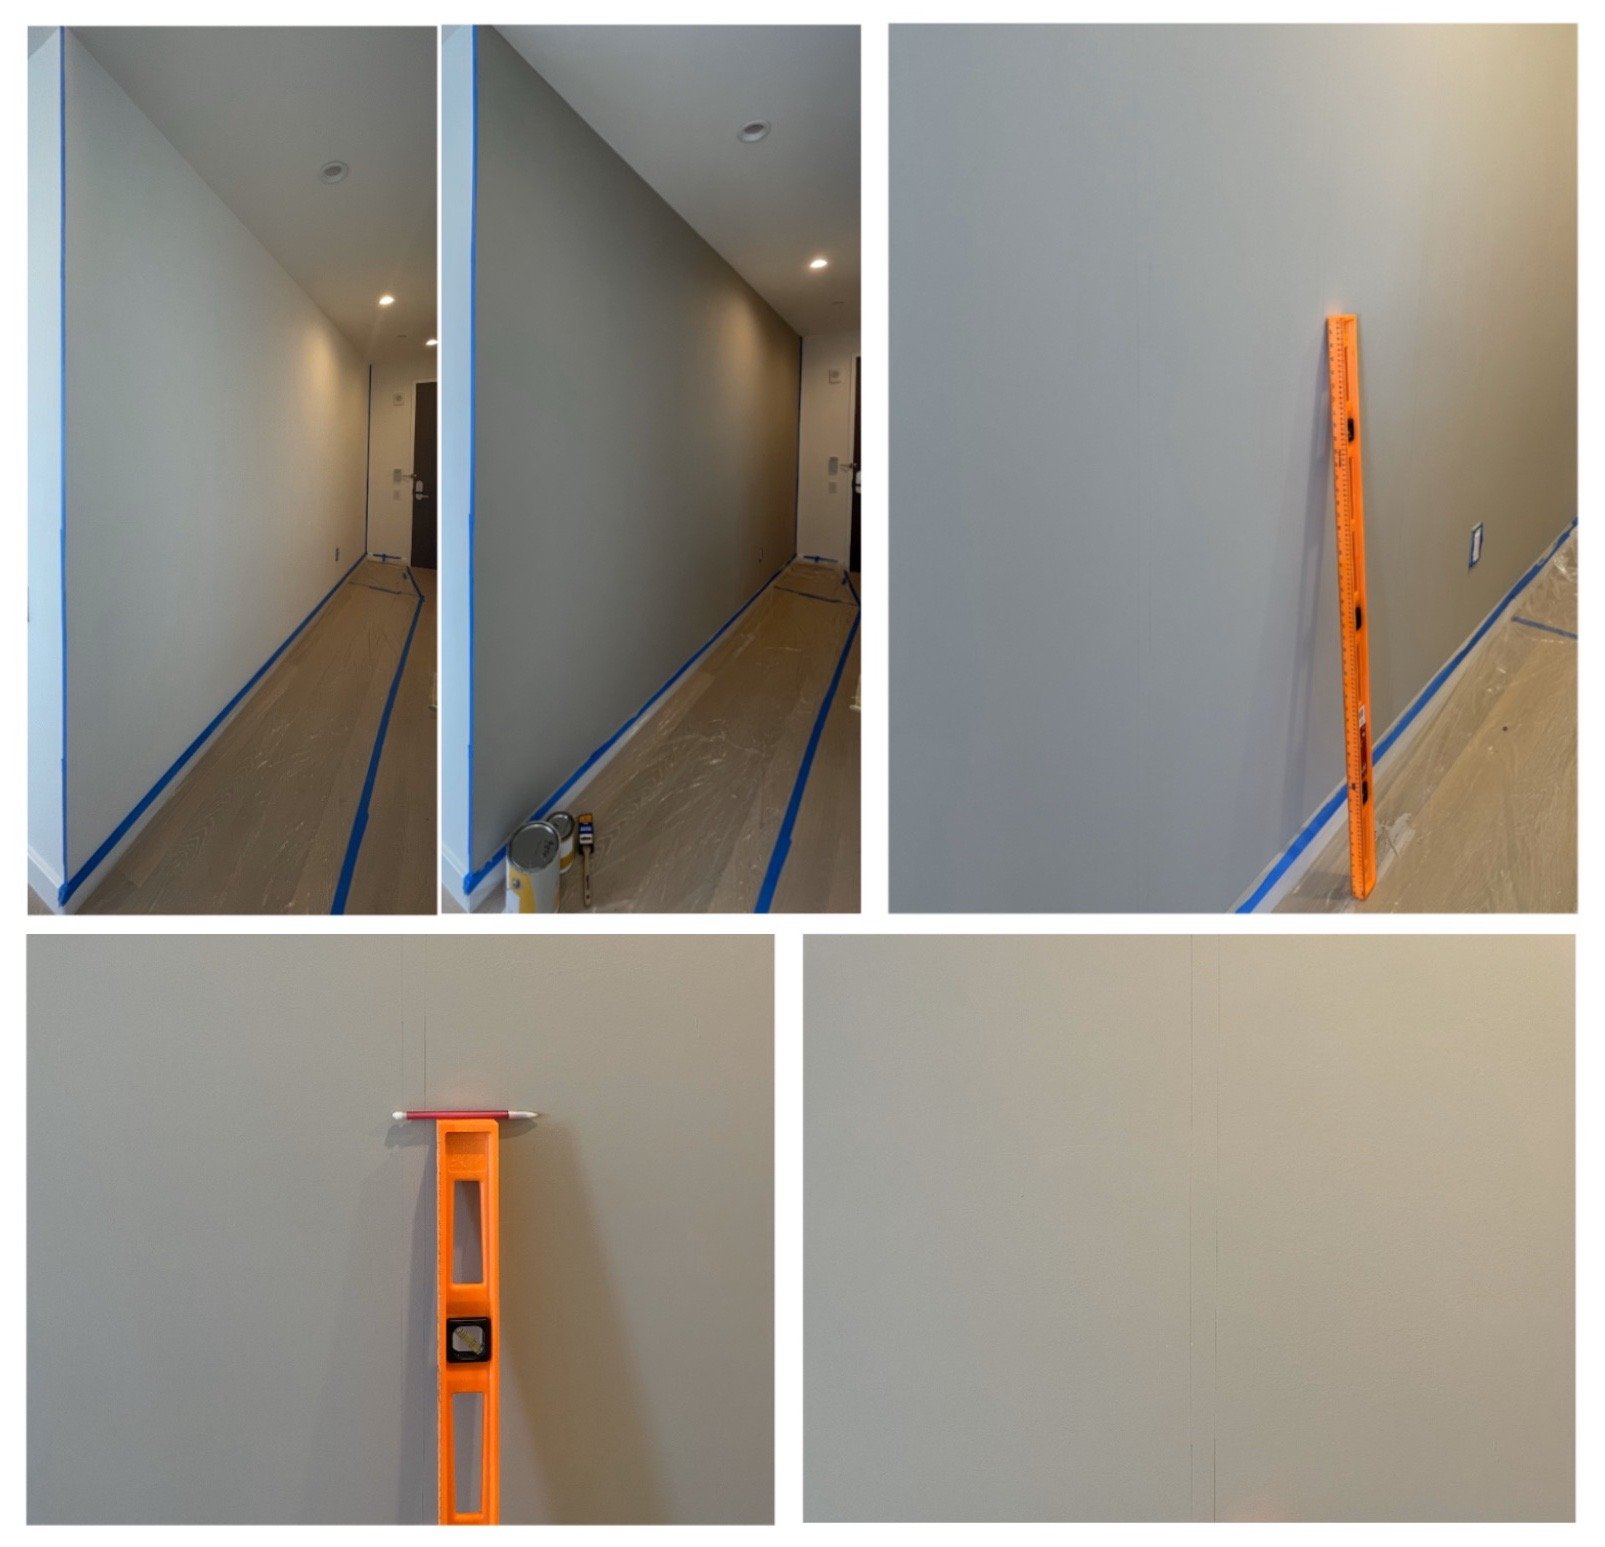
MAKE GUIDELINES
Depending on your design, you’ll want to mark up your wall with guidelines to help you know exactly where to paint. The first step before marking up the wall however is painting it the base color if you have one. For this mural, the base is “Stone Hearth” by Benjamin Moore.
An important part of this design is to determine how many columns there are on the wall and how many round shapes are in each. Using a large level was very helpful when creating the guidelines for the columns. Marking very lightly with a pencil a line from the base board to the ceiling insured each column would be straight.

IMPERFECTION IS PERFECT!
This design is a repeated pattern but it’s not important that all the shapes aren’t perfectly the same. The beauty in this design is that each one is hand painted and with it all finished, the design is unique and looks amazing!
A 1” brush was used to outline the shapes and a 2” brush was used to paint the insides. The paint color is “Raccoon Hallow” by Benjamin Moore. Once one coat is done, let it dry a finish it off with one more if you see fit!
